Customizing motorcycles is no longer restricted to installing new luggage bags and stylish aftermarket parts, such as sissy bars and fairings. In fact, painting has become the most popular way to customize motorcycles in recent years. Nowadays, you can often spot motorcycles featuring quirky decals and graphics on the fenders and fuel tanks. However, it is now possible to extend paint jobs to engines and exhaust systems.
Motorcyclists are often hesitant to cover the exhaust systems with paint because they fear this might clog the pipes and damage their motorcycles. However, if done right, painting an exhaust system can cover the rust and restore its look. This article provides all the information you need to know how to paint your motorcycle exhaust.
Also Read: How to Paint a Motorcycle Fairing
Table of Content
1. Benefits of Painting Your Motorcycle Exhaust
Many riders paint the exhaust pipe to enhance their motorcycles’ aesthetic appeal. However, painting a motorcycle exhaust can have additional benefits. Though OEM exhaust systems that come with motorcycles can last a long time, it can actually quickly become rusted and lose their finish. Paint on the engine or exhaust pipes can prevent corrosion.
If you want to avoid having to replace the exhaust system every 3-6 months, it is best to invest in high-quality motorcycle exhaust paint.
High glossy paint prevents dirt from building up on the exhaust pipes. A clean exhaust system can expel the toxic gasses from the combustion chamber. This ensures less stress is put on the engine, reduces fuel consumption, and improves overall performance.
Also, painting the exhaust system with heat-resistant paint will help keep it from overheating. Brighter colors will help reduce the heat from emissions. A cooler pipe is less likely to melt nearby plastic parts.
2. Should You Paint Your Motorcycle Exhaust System Yourself?
To paint your motorcycle’s exhaust system, you need to purchase high-quality paint. Most riders with experience customizing should have little difficulty finding and applying paint. However, if you are new to customization and have no experience using spray paint, this task may require more time and caution. Otherwise, the paint will peel off and expose the exhaust pipes to rust and dust. If you don’t feel confident painting your motorcycle’s exhaust system, then it is best to seek professional help.
3. The Cost of Painting a Motorcycle Exhaust System
Painting a motorcycle exhaust system is not cheap, even when doing it yourself at home. This is because heat-resistant paint is so expensive. Purchasing primer, paint, and a clear coat can cost about $150-$250.
Hiring a professional painter can cost around $350-$500; however, it would still be less than paying for a replacement exhaust system for $750-$1,200.
4. Recommended Paint for Motorcycle Exhaust Systems
Though a wide range of motorcycle exhaust paints is available on the market, you should always get heat-resistant spray paint. They are easy to apply, has a high glossy finish, and can withstand high temperatures. The most popular paints for motorcycle exhaust systems are listed below:
| Motorcycle Exhaust Paint | Price | Pros | Cons |
|---|---|---|---|
| VHT Flameproof Coating | $21.94 per 11 oz aerosol spray | Heat Resistance of 1,300-2,000 °F/704- 1093 °C Non-Flammable Easy-to-Use Aerosol Spray Can Ceramic Coating Does Not Fade Easily Prevents Scratches, Cracks, and Peeling Prevents Dust Build-Up Flat Finish Readily Available Extends the Longevity of the Exhaust System Long-Lasting Curing Can Be Done While Riding Available in Multiple Colors |
Curing Time Required Paint Must Be Dry Before Curing High Maintenance – Requires Frequent Cleaning Primer & Clear Coat Required |
| PJ1 Fast Black High Temperature Paint | $21.85 per 12 oz aerosol spray | Silica Ceramic Hybrid Heat Resistance up to 1500 °F/816 °C Maximum Heat Dissipation Durable Flat Finish Prevents Peeling, Chipping, Cracks, Flakes, Scratches, & Blisters Prevents Dust & Grime Build-Up Protects from Rust and Corrosion Easy to Apply Can Be Applied Directly Without Primer |
Available in Flat Black Only 24 Hour Cure Time |
| JEGS High Temperature Resistant Paint | $8.62 per 12 oz aerosol spray | Budget-Friendly High-Quality Aluminum Finish Heat Resistance Up to 1200 °F/650 °C Durable Matte Finish Easy to Apply Aerosol Packing Long-Lasting Doesn’t Fade Quickly Low-Maintenance Covers Ensure a Smooth Finish Can Be Applied Directly; Primer Not Required Can Be Applied to the Exhaust Header, Muffler, and Pipes Prevents Peeling, Blisters, Scratches, and Adhesion Loss |
Aluminum Finish Can Create a Stark Contrast if the Motorcycle Has a Blacked-Out Exterior. High Glossy Shine Not Available Must Be Cured at 400 °F/204 °C for Two Hours |
The paints listed above have adequate temperature resistance because they feature ceramic. Ceramic coating lasts longer, has high heat resistivity, and offers a better finish. However, ceramic coating is not necessary. Just make sure you do not buy regular aerosol spray paints with low heat resistance. These paints do not offer the industry standard finish and they also peel off quickly when exposed to extremely high temperatures. Due to the flammability of non heat resistant paints burn off quickly and you also run the risk of catching fire.
5. Step-by-Step Motorcycle Exhaust Painting Technique
Here is a quick overview of what you need to do to paint your motorcycle exhaust.
| 7 Step for Applying Motorcycle Exhaust Paint |
|---|
| Remove the Exhaust Pipe |
| Prep and Clean the Exhaust (Remove Dust, Grease, & Rust) |
| Sand & Scrape the Exhaust |
| Apply Light Coat of High Heat Primer - (If Your Paint Requires) |
| Apply 2-3 Coats of High Heat Paint |
| Re-Install the Exhaust Back on the Bike |
| Cure |


5.1 Tools Required
- Heat-Resistant Paint
- Heat-Resistant Primer (optional)
- 180 and 400 Grit SandPaper
- Wax/Grease Remover
- Rust Remover (optional)
- Screwdriver
- Allen Wrench
- Orbital Sander
- Microfiber Cloth
5.2 Remove the Exhaust
The exhaust can be painted while it is still attached to the frame. However, this creates a risk of leaving some parts uncovered by the paint. Unfasten two bolts on either side of the exhaust pipes with an allen wrench or screwdriver.
5.3 Clean the Exhaust
Clean off dust, grime, and rust from the exhaust. Spray grease and rust remover until the exhaust is soaked, then clean the residue with a clean microfiber cloth.
5.4 Sand the Exhaust
Use a 180 grit sandpaper and the orbital sander to buff and smooth the surface. After using 180 grit sandpaper, clean the exhaust with a fresh cloth. Sanding also helps remove rust and dirt the grease and rust remover couldn’t get rid of.
Next, use 400 grit sandpaper to scrape off old paint or chrome plating. Keep sanding until the metal on the exhaust is exposed. Once you finish sanding, wipe off the paint, chrome, and rust residue with a wax remover.
5.5 Apply the Primer
Before painting the exhaust, make sure your workspace is ventilated, has less than 60% humidity, and has an air temperature between 60 °F/16 °C-95 °F/35 °C.
Wear a paint respirator to keep yourself from breathing in chemicals. Hang the exhaust with bungee cords and spray a light coat of heat-resistant primer on it. Make sure all the parts are covered without creating thick layers of primer. Usually a single coat of primer is enough, but you can apply a second or third coat if necessary. Wait for 10 minutes in between applying coats so the layers combine. Leave the primer to dry for 60-90 minutes.
It is also worth mentioning that not all exhaust paints require a primer. Read the instructions for the paint before buying and applying primer.
5.6 Apply the Color Coat
Apply the heat-resistant paint once the primer is dry. Spray a light coat and wait for 15 minutes before applying the next coat. You usually only need 3-4 coats of paint. Leave the paint to dry for 60-90 minutes. Afterward, check for irregular patches, cracks, and flakes. If the paint fails to stick or peels off the exhaust, you may have to sand the entire exhaust again.
5.7 Reinstall the Exhaust
Once the paint is dry, re-install the exhaust by tightening the four bolts removed earlier. Once installed, check for leaks by letting the motorbike run while in neutral. If the exhaust emits smoke, it means the exhaust is not fitted properly. Consider visiting a mechanic for help.
5.8 Cure the Paint
Curing is a process that helps improve the durability of paint against fluids and high heat. Until the paint bonds to the exhaust and hardens, it is not considered cured.
The curing time differs between types of paint, with the instructions listed on the cans. Many types of paint can be cured while the motorcycle is parked or running. If you decide to cure the paint while riding, let your motorcycle idle for 10 minutes, then let it cool for 20 minutes. Next, let the bike idle for 20 minutes, then let it cool for 20 minutes. Finally, ride around on roads in good condition for 30 minutes. Try to ride your motorcycle at a low speed to avoid damaging the engine.
To facilitate curing, you can heat the paint at 250 °F/121 °C for half an hour and then cool it for the same amount of time. Next, heat the paint for 30 minutes at 400 °F/204 °C and then cool it for 30 minutes. Finally, heat the paint at 650 °F/343 °C for 30 minutes.
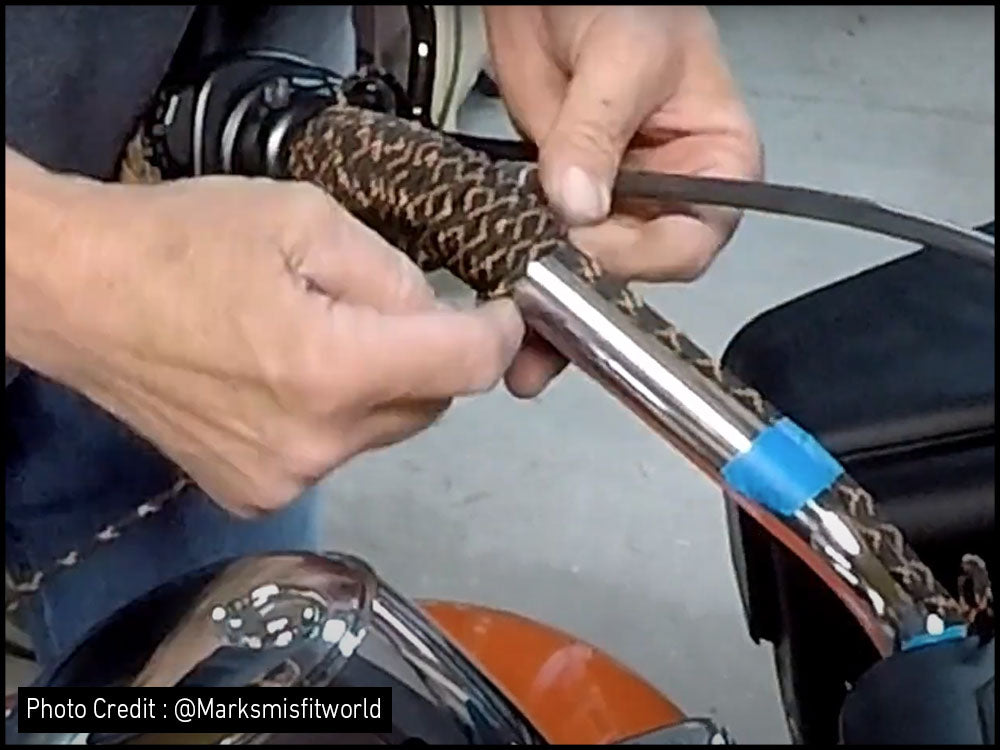
6. Exhaust Wrap Kit
If you want to give the motorcycle exhaust a new look, you can accomplish this with an exhaust wrap. Available in multiple colors, the exhaust wrap acts as an insulator and offers protection from high, dirt, rust, and automotive fluids. Plus, it hides scratches, discoloration, chipping, and other imperfections. Exhaust wrap is easy to apply, budget-friendly, low-maintenance, and long-lasting. However, if it is exposed to rain, the moisture can become trapped and cause increased rusting. If you live in a region that receives heavy rainfall year-round, then it is best to paint the exhaust.
Also Read: How to Heat Wrap a Motorcycle Exhaust
7. Takeaway
You can use heat-resistant paint to restore and protect your motorcycle exhaust. Whether you choose ceramic or non-ceramic paint, make sure it can handle high temperatures.
Beginners might have to re-sand and re-paint their exhaust systems after every long-distance trip. Each time, apply light coats of paint so they can be easily removed with sandpaper. While a primer and clear coat are not necessary, adding them can help improve the paint job if you have the budget.
Always wear safety gear before painting the exhaust system as the paint contains carcinogenic chemicals that can damage your respiratory system.
If you want your motorcycle’s exhaust system to look well-maintained, make sure to clean the dirt and touch up the paint frequently.
Popular Collections


Leave a comment
All comments are moderated before being published.
This site is protected by hCaptcha and the hCaptcha Privacy Policy and Terms of Service apply.